Key Takeaways
- Identify Damage Causes: Understanding the root causes of paver cracks—weather, heavy loads, improper installation, tree roots, and erosion—helps prevent future issues.
- Choose the Best Repair Method: Whether using polymeric sand, concrete caulk, or epoxy resin, selecting the right repair approach ensures a long-lasting fix.
- Prioritize Installation & Maintenance: A solid foundation, proper drainage, and regular re-sanding and sealing extend the lifespan of your pavers.
- Act Quickly to Prevent Bigger Issues: Addressing minor cracks early prevents costly repairs and maintains the beauty and safety of your outdoor space.
Paver blocks are a popular choice for pathways, patios, and driveways due to their aesthetic appeal, durability, and versatility. However, exposure to the elements and everyday wear and tear can lead to cracks and shifting. Ignoring these issues can result in costly repairs or even complete replacement. This guide covers everything you need to know about identifying, repairing, and preventing damage to your pavers, helping you maintain a pristine outdoor space for years to come.
Common Causes of Paver Damage
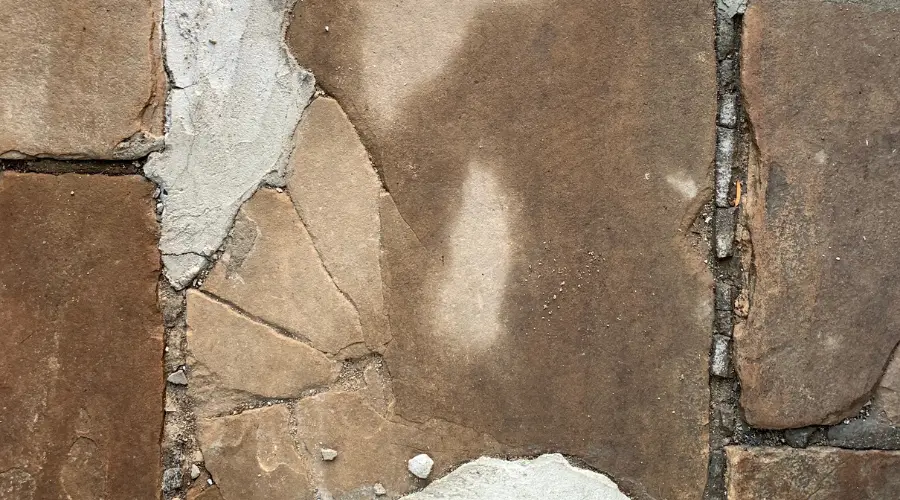
Cracks and damage in paver installations typically stem from the following factors:
1. Harsh Weather Conditions
Fluctuations in temperature—especially in regions with freeze-thaw cycles—cause pavers to expand and contract. Over time, this movement weakens the surface, leading to cracks.
2. Heavy Loads & Traffic
Driveways and commercial walkways endure constant pressure from vehicles and foot traffic. Overloading can stress individual pavers, causing them to crack or sink.
3. Improper Installation
A poorly compacted base or insufficient joint sand can result in shifting pavers, leading to gaps and cracks. Proper installation is crucial for long-term stability.
4. Tree Root Intrusion
Roots from nearby trees and shrubs can push pavers upward, creating an uneven surface or cracks. This is a common issue in landscaped areas with large plants nearby.
5. Erosion & Poor Drainage
Water washing away the base material under your pavers can lead to instability. Poor drainage accelerates erosion and increases the risk of sinking or cracking.
How to Repair Cracked or Damaged Pavers
Depending on the severity of the damage, different repair methods may be necessary. Here’s how to address various types of paver cracks:
1. Filling Small Cracks with Polymeric Sand
- Sweep polymeric sand into the cracks.
- Lightly mist the surface with water to activate the bonding agents.
- Allow it to dry completely, forming a solid, water-resistant seal.
2. Sealing Moderate Cracks with Concrete Caulk
- Use a masonry cleaner to remove dirt and debris.
- Apply concrete caulk into the cracks and smooth with a putty knife.
- Let it cure according to the manufacturer’s instructions.
3. Repairing Deep Cracks with Epoxy Resin
- Mix the epoxy resin according to the package instructions.
- Pour it into the cracks, ensuring full coverage.
- Let it dry to create a durable, weather-resistant bond.
4. Replacing Severely Damaged Pavers
If a paver is beyond repair, replacement is the best solution:
- Step 1: Remove the damaged paver using a pry bar.
- Step 2: Add or level the base material.
- Step 3: Insert the new paver and adjust to match the existing layout.
- Step 4: Refill joints with sand and compact the area for stability.
Pro Tips for Long-Lasting Paver Maintenance
1. Inspect Your Pavers Regularly
Look for early signs of damage every season. Identifying minor cracks before they worsen saves time and money on repairs.
2. Use Quality Materials
Invest in high-quality pavers, joint sand, and sealants to improve longevity and reduce maintenance needs.
3. Ensure Proper Drainage
Poor drainage leads to erosion and shifting. Make sure your pavers are installed on a slope or have proper drainage channels.
4. Apply a Sealant
Sealing your pavers every 2-3 years protects them from moisture, stains, and UV damage.
5. Control Weed Growth
Use polymeric sand or a weed barrier fabric to prevent weed roots from destabilizing your paver joints.
6. Limit Heavy Loads
If pavers are used in a driveway, opt for thicker pavers or reinforced base layers to withstand vehicle weight.
7. Address Root Issues Early
Trim tree roots or install root barriers to prevent upward pressure on your pavers.
8. Maintain Joint Sand
Refill joint sand as needed to keep pavers stable and prevent shifting.
Conclusion
Keeping your pavers in top condition requires proactive care and timely repairs. A well-maintained paver installation enhances curb appeal, prevents safety hazards, and adds value to your property. By following these expert repair and maintenance strategies, you can enjoy beautiful, durable paver surfaces for years.
For professional paver repair and installation services in Jersey City, contact our team today—we’re here to help you keep your outdoor spaces in peak condition!
Frequently Asked Questions (FAQ)
1. How often should I inspect my pavers?
Twice a year, preferably in spring and fall, to catch any seasonal damage early.
2. Can I drive heavy vehicles on pavers?
Yes, but it’s best to use reinforced pavers and distribute the weight to avoid cracks.
3. What’s the best way to prevent water damage?
Ensure proper drainage, seal your pavers, and check for pooling water regularly.
4. Is polymeric sand better than regular joint sand?
Yes, polymeric sand hardens when moistened, offering better water resistance and weed prevention.
5. Can tree roots permanently damage pavers?
If not managed early, roots can lift and crack pavers. Consider installing a root barrier.
6. How long do epoxy resin repairs last?
Epoxy repairs are highly durable but may need reapplication after several years of wear and exposure.
7. Should I reseal my pavers every year?
Generally, every 2-3 years is sufficient, but high-traffic areas may need more frequent sealing.
8. How do I fix pavers that have shifted?
Remove, level the base, and reinstall them with fresh joint sand to secure them in place.
Get Expert Paver Repair Help Today!
Don’t let cracked pavers ruin the look of your outdoor space. Contact our team today for expert repair and maintenance services in Jersey City!

