Sidewalks made of separate sections usually make repairs or replacements straightforward, seamlessly fitting in with their surroundings. In contrast, sidewalks formed from one solid piece, like asphalt or concrete, need cutting and patching when they get damaged, often leaving noticeable marks.
Trust us for exceptional outcomes at an affordable rate. Don’t gamble with novices—your property merits excellence. Contact Jersey City Paving at (201) 977-4882 today!
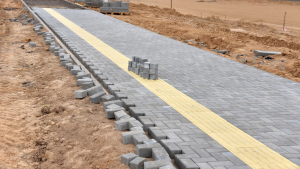
Substituting individual components
This technique is applicable to bricks, blocks, flagstones, and any other paving composed of individual units.
To replace block paving, the existing blocks must be removed and replaced with new ones.
When replacing a single unit or a section of paving, the targeted unit must be entirely extracted from the pavement. If other units require removal, they can be subsequently taken out with ease. Two straightforward methods are accessible for removing this initial unit.
The gentle method
Employing a non-intrusive technique, we carefully elevate the unit using a trowel or the heel of a bolster, gently separating two opposing edges of the block or flagstone. Though the example depicts the removal of a block, the process remains consistent for flagstones. With the levers in place, we steadily lift the unit by gently wiggling it upwards, making minor adjustments on each side until it disengages from the pavement. Generally, this method maintains the integrity of the block, facilitating its potential reuse.
Utilize the tip or heel of the trowel to lift one side of the block. Initially, removing a half-block facilitates inserting the trowel tip/heel.
The first trowel is employed to keep the initial (cut) edge elevated, while the second trowel raises the opposite side.
Continue to gently wiggle the trowels to gradually lift the sides alternately until the block loosens and can be extracted.
The aggressive approach
Employing a sharp chisel, one can pierce the block and subsequently pry the fractured parts from the pavement. The chisel, whether flat or pointed, should be inserted into the block at approximately a 30° angle from vertical until the block breaks apart. It’s essential to note that this technique renders the block unsuitable for further use. Hence, it’s advisable to have spare or replacement blocks readily available to replace the damaged ones.
After the initial unit is extracted, adjacent units can be relatively straightforward to remove by applying leverage from underneath. In the case of flags, it might be necessary to cut through mortar joints to release them. At the same time, blocks may occasionally be securely held by jointing sand, necessitating a gentle wiggle to dislodge them. It’s crucial to remember that certain blocks and bricks, especially clay pavers, have two usable surfaces. Flipping them over can unveil a fresh, undamaged, or unmarked face.
Retrieve the necessary section of the pavement, neatly stacking the blocks nearby for potential future use. Eliminate any jointing sand clinging to the edges of the blocks or mortar adhering to the edges of the flags. Ready the exposed bedding layer by either floating, troweling, or screeding it to prepare for the replacement of paving units. Adjust the bedding material as needed for leveling purposes. In the case of larger areas, ensure the surface level of the bedding layer using straight-edge timber and one of the salvaged blocks as a reference. Maintain the bedding layer approximately 5mm higher to allow for re-compaction.
After preparing the bedding:
- Reposition the blocks/flags as necessary, incorporating spare or replacement units as required, and secure them with dry jointing sand or mortar joints.
- Ensure comprehensive re-consolidation of the mended area, preferably employing a vibrating plate compactor for a block or small-element paving or a roller for other flags.
- Review the level of sealing sand after 3-4 weeks and add more if needed.
When replacing worn or stained block paving with new ones, the fresh blocks appear brighter, potentially creating a noticeable contrast. To reduce this difference, we provide each client with additional blocks closely resembling the originals. This guarantees consistency as manufacturers may alter their production methods over time, ensuring replacements come from the same batch.
When batch-matched paving isn’t available, reducing the visual contrast caused by new blocks can involve blending them with clean existing blocks sourced from nearby unstained areas. For instance, if there’s a stain affecting one square meter, we might lift two square meters of paving, discard the affected blocks, mix in the replacement blocks, and reinstall the entire area.
In many cases, after 12 months, it becomes challenging to distinguish between the original paving and the replacements, as they naturally blend over time.
Replacing flagstones/slabs
For other types of pavements set in mortar, the replacement process closely mirrors what was previously described for block paving. The mortar joint needs to be eliminated, preferably with a power saw, although it can also be chiseled out using a hammer and bolster. Once the paving unit is levered out of the pavement, it should be stored or discarded as necessary, and the bedding layer should be readied for resetting the unit. Apply mortar to the receiving edges of the pavement before reinstalling the units. Utilize a pavior mall to tap them down to level, then proceed to repoint the joints.
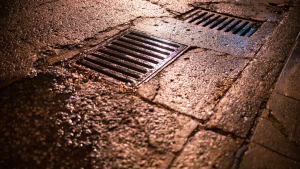
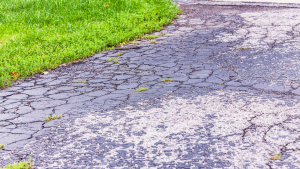
Repairing non-modular surfaces
Materials like tarmacadam, concrete, pattern imprinted concrete (PIC), and resin surfacing are considered ‘monolithic,’ rather than modular, meaning they can only be patched rather than replaced in sections. However, these patch repairs often remain noticeable despite efforts to conceal them. Particularly, PIC and resin surfaces present challenges in repair, usually resulting in obvious patches. Even bitmac, typically perceived as ‘black,’ proves difficult to match in terms of color, texture, wear, and weathering.
In most cases, it’s advisable to involve the original contractor in repairing or patching these surfaces whenever possible. They are likely familiar with the materials and techniques used initially, providing the best chance for a less conspicuous repair.
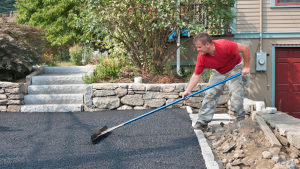
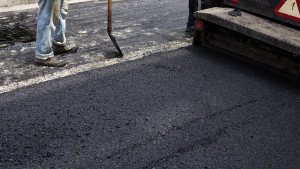
Repairing Tarmacadam
Begin by outlining the patch area, ensuring ample working space and avoiding any cracks or crumbling, maintaining a distance of at least 100mm from them. Use a dust-suppressed Power Saw to cleanly cut through the surface along the entire perimeter of the repair zone. Remove the unwanted surfacing using chisels, a jackhammer, or a pick and spade, and dispose of it off-site. The saw cuts ensure a neat, straight edge for the patching process. While a standard handheld cut-off saw is generally sufficient, a trolley-mounted floor saw is preferable for larger areas.
Before applying new material, seal the vertical edges of the cuts with a jointing compound called “cold pour,” which is available from civil merchants. This compound effectively seals the joint, preventing water penetration beneath the surface, which could lead to repair failure during freeze-thaw cycles.
For the repair, it’s advisable to use fresh, hot bitumen, applying it in at least two layers and compacting each layer with an asphalt tunnel, vibrating plate compactor, or roller. Seal the ‘seams’ of the repair with cold pour compound (as mentioned earlier) to prevent water infiltration. Although this may make the repair more visible, it significantly reduces the risk of failure caused by water penetrating the joint.
Macadam suppliers typically prefer orders of 3 tonnes or more and may impose high part-load charges for smaller quantities. However, some batch plants may accommodate smaller loads, like half a tonne, on a trailer or private wagon. When transporting macadam, it’s crucial to cover the material with a tarp or similar to retain as much heat as possible; otherwise, it can become challenging to handle.
FAQ
Using pre-packaged macadam
Many builders’ merchants offer pre-packaged repair macadam, which is often more cost-effective than ordering hot bitmac in small quantities. Typically priced around £8 for 25kg, this equates to £320 per tonne, compared to £50-60 per tonne ex-works. However, for loads less than 1 tonne, batch plants often impose a part-load charge of approximately £150-180. Hence, quantities exceeding 1 tonne are best procured as hot, fresh material.
As a guideline, a 25kg bag of repair bitmac usually covers approximately 0.45m² at a thickness of 25mm. However, it’s essential to maintain a minimum depth of 70mm for any macadam surface. At this thickness, coverage decreases to about 0.16m² per 25kg bag, requiring slightly over six bags to cover each square meter.
Pre-packaged tarmacadam is treated with a cutting agent or “doped” to delay setting until exposed to the air, allowing the doping oils to evaporate gradually over time. Although supplied cold, they perform optimally if left in a warm area for several hours before use. Once unpacked, spread the tarmacadam as needed and compact it to level, following the same procedure as with hot tarmac. It may take several weeks for the doping oils to evaporate completely, but the compacted surface should be usable almost immediately.
If the repaired tarmacadam surface remains tacky and sticks to car tires or shoe soles, sprinkle fine sand over it, similar to flour on a work surface, before rolling out the pastry. The sand will gradually wash away over time.
These pre-packaged repair tarmacadams are limited. While suitable for minor repairs, we advise against using them for areas larger than a couple of square meters. They remain soft for several weeks and are susceptible to penetration by any point load, such as a motorbike’s side stand or a lady’s stiletto heel.
For patching areas spanning from 2 to 20 m², you might find a local tarmacadam contractor willing to order an extra tonne or so if you offer them beer vouchers as an incentive.
Bitmac cover-ups
Many products on the market offer the opportunity to refresh an existing tarmacadam surface, giving it a renewed appearance. Some function essentially as paints, while higher-quality options actively adhere to the existing tarmacadam and rejuvenate the bitumen binder. These products yield optimal results when applied to cover an entire driveway or courtyard rather than just touching up patches.
Available under various names such as Tarmac Sealers, Tarmac Sealcoats, or Tarmac Paints, there’s an increasing array of alternatives. However, it’s crucial to select the most suitable product carefully for each specific task.
They can effectively conceal minor imperfections or patches on tarmacadam surfaces or breathe new life into a worn driveway’s appearance. These products are sometimes found at builders’ merchants, larger DIY stores, and construction chemical suppliers in standard black or burgundy red shades. However, for smaller quantities, they may need to be specially ordered.
The tarmacadam surface designated for treatment should be completely cleared of dust and trash and cleansed. Our standard procedure involves power-washing the surface and allowing it to dry before applying the seal coat product. Typically, two coats are needed, and we recommend using a long-handled squeegee for application to minimize strain on the back.Let each layer fully dry before adding the next one. They usually dry within 2-3 hours and can withstand traffic once completely dry.
Patching concrete
Similar to macadam (bitmac/tarmac), repairing concrete often results in noticeable changes. Due to various factors, achieving an exact match with the existing surface is typically impractical or unattainable. Even if an exact match were feasible, noticeable lines would remain where the old surface was removed and the new surface installed.
This applies whether it’s a simple, plain concrete surface or a highly decorated, colored, and textured pattern imprinted surface. Achieving an invisible repair is not realistic.
Stains alone usually need to be reason enough to break out and patch a concrete area. However, specific situations necessitate concrete restoration, such as salt or frost damage, repairs to underground services, or the removal of harmful tree roots. This section will address two types of repairs: shallow surface repairs and full-depth repairs.
Shallow repairs
This method is suitable for addressing minor surface imperfections or flaws, such as those caused by salt and frost damage. Start by marking out the area to be repaired and cutting the perimeter with a power saw to a depth of at least 40mm. Next, remove the damaged concrete surface by chipping it out with a hammer and chisel or using a demolition hammer from a hire shop. When replacing salt or frost-damaged concrete, ensure that all loose and unsuitable material is removed to a depth of at least 40mm. Thoroughly clean the repair area and brush away as much dust as possible.
Subsequently, treat the exposed concrete surface with PVA or SBR bonding agents or clean it with an acid-etching fluid. The fresh concrete intended for the repair should be a high-strength mix supplemented with PVA, SBR, or a hardening agent. Generally, granolithic concrete is favored for these types of repairs. For further information on high-strength and granolithic concretes, please refer to the Jersey City Paving!
Spread the fresh concrete evenly, tamp it to level, and finish it by floating it as necessary. Ensure that the fresh concrete is firmly worked into the edges of the repair and aligns flush with the existing surface.
It’s advisable to cover or fence off wet concrete, as neighborhood cats and curious children may leave their pawprints behind. Typically, the repair can withstand traffic after 3-4 days.