Upgrade your home’s curb appeal with a well-paved driveway. This comprehensive guide covers every step—from planning and preparation to materials and maintenance—ensuring a smooth, durable driveway that stands the test of time.
Key Takeaways
- Proper Planning is Crucial: Accurate measurements, budgeting, and obtaining permits are essential for success.
- Material Matters: Choose durable materials like asphalt, concrete, or pavers based on your needs and environment.
- Safety & Environment First: Use protective gear and dispose of materials responsibly to ensure a safe and eco-friendly project.
- Professional Help: While DIY is an option, hiring professionals guarantees long-lasting results with minimal stress.
The Ultimate Guide to Driveway Paving
A beautifully paved driveway enhances your home’s aesthetic and provides practical benefits like smoother access and increased property value. Whether you’re considering a DIY approach or hiring experts, this guide walks you through the essentials to achieve a flawless result.
Step 1: Assessing Your Driveway
Before diving into your paving project, evaluate your current driveway condition. Identify obstacles like overgrown trees, utility poles, or debris. Addressing these issues upfront ensures a smoother process and avoids complications during construction.
Key Tips:
- Remove any vegetation or obstacles in the paving area.
- Check for drainage issues to prevent water pooling.
- Allocate space for construction materials and equipment.
By thoroughly assessing your driveway, you set the stage for a hassle-free paving experience.
Step 2: Calculating Costs
Paving a driveway involves several cost factors, from materials and labor to permits and additional groundwork. An accurate budget prevents unexpected expenses and ensures your project stays on track.
Cost Breakdown:
- Materials: Asphalt, concrete, gravel, or pavers vary in cost.
- Labor: Professional paving services often include equipment and expertise.
- Site Preparation: Clearing and leveling the area may require additional expenses.
- Permits: Check local regulations for necessary permits.
Pro Tip: Obtain multiple quotes from contractors to compare pricing and services.
Step 3: Measuring the Area
Accurate measurements are critical for determining material needs and estimating costs. Use a tape measure to calculate the length and width of your driveway, accounting for any irregular shapes.
How to Measure:
- Divide irregular areas into smaller rectangles or triangles.
- Calculate the total area by summing individual sections.
- Add 5-10% extra material for waste or unforeseen adjustments.
This step ensures you have sufficient materials and avoids costly delays.
Step 4: Obtaining Permits
Before starting construction, secure the necessary permits from your local municipality. Compliance with regulations prevents legal issues and ensures your driveway meets safety standards.
Common Permit Requirements:
- Property line setbacks.
- Environmental impact assessments.
- Driveway dimensions and drainage plans.
Research your area’s specific requirements to streamline the approval process.
Step 5: Choosing the Right Materials
Selecting the right material for your driveway impacts its durability, maintenance, and appearance. Consider your local climate, usage, and aesthetic preferences when making a decision.
Material Options:
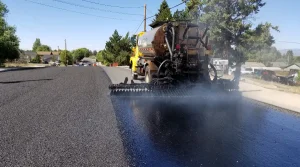
- Asphalt: Affordable, quick to install, and ideal for moderate climates.
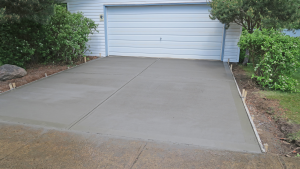
- Concrete: Durable, low-maintenance, and suitable for heavy traffic.
- Gravel: Budget-friendly with a rustic charm but requires regular upkeep.
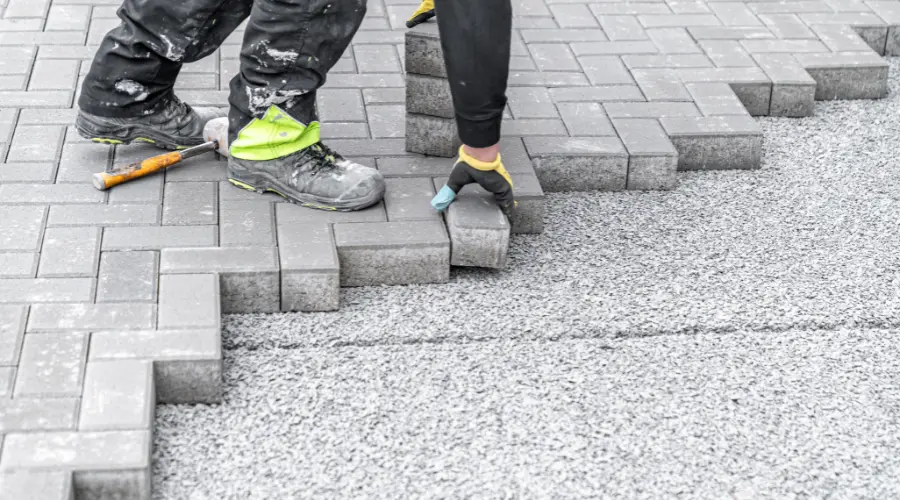
- Pavers: Versatile and visually appealing, though more expensive.
Considerations:
- Durability and lifespan.
- Cost of installation and maintenance.
- Compatibility with your home’s style.
Step 6: Preparing the Site
Proper preparation ensures a sturdy, long-lasting driveway. Begin by clearing the area, leveling the ground, and addressing drainage issues.
Steps for Preparation:
- Excavation: Remove old pavement, debris, and topsoil.
- Grading: Level the area and create a slight slope for water runoff.
- Base Layer: Lay a strong foundation using crushed stone or gravel.
Attention to detail in this phase prevents cracking and water damage in the future.
Step 7: Safety and Environmental Considerations
Safety and eco-friendliness are crucial throughout the paving process. Protect workers and the environment by following best practices.
Safety Tips:
- Wear protective gear (gloves, goggles, masks).
- Use caution when operating machinery.
- Keep the worksite organized to prevent accidents.
Environmental Practices:
- Dispose of waste materials responsibly.
- Recycle old asphalt or concrete when possible.
- Use sustainable paving materials to minimize environmental impact.
Step 8: Hiring Professionals vs. DIY
While DIY paving can save money, hiring professionals ensures high-quality results with less effort on your part. Consider your skill level, available time, and budget before deciding.
Benefits of Professionals:
- Expertise in handling materials and equipment.
- Access to advanced tools for precise work.
- Faster completion with guaranteed durability.
DIY Tips:
- Rent necessary equipment and follow manufacturer guidelines.
- Start with a small project to build confidence.
- Watch tutorial videos or seek advice from experienced DIYers.
FAQs About Driveway Paving
Q: How long does it take to pave a driveway?
A: Professional driveway paving typically takes 2-5 days, depending on the size and complexity. DIY projects may take longer.
Q: What is the average lifespan of a paved driveway?
A: With proper maintenance, asphalt driveways last 15-20 years, while concrete driveways can last 25-30 years.
Q: How often should I seal my driveway?
A: Asphalt driveways should be sealed every 3-5 years to protect against weather and wear. Concrete driveways may require less frequent sealing.
Q: Can I pave a driveway in cold weather?
A: It’s best to pave during warm, dry conditions to ensure proper curing. Cold weather can cause materials to crack or set unevenly.
Q: How do I maintain my driveway?
A: Regular maintenance includes:
- Cleaning debris and stains.
- Filling cracks promptly.
- Resealing as needed to prevent water damage.
Conclusion
A well-paved driveway is an investment that enhances your home’s curb appeal, functionality, and value. By carefully planning, choosing suitable materials, and prioritizing safety, you can achieve a driveway that stands the test of time. Whether you opt for DIY or professional services, following these steps ensures a smooth, durable, and visually appealing result. Ready to transform your driveway? Start planning today!
If you’re in Jersey City and need a reliable, experienced paving company, look no further!
We deliver high-quality results at budget-friendly prices that won’t break the bank. Don’t trust your project to amateurs—your property deserves the best. Choose Jersey City Paving for top-notch service you can count on!